Ok, so I didn't really dance when I made these, but I did do a little happy head sway.
I saw these on Joy the Baker's site, and fortunately no one else had any other suggestions on the lets cook group (we do a weekly bake-along).
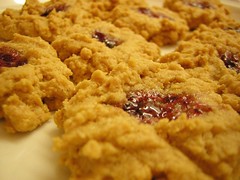
There is seriously nothing to these.
Peanut butter, sugar, egg, and baking soda. That's it.
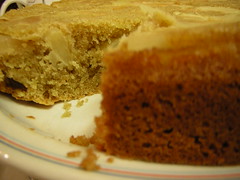
Last week I made Almond and Apple Cake. It was pretty easy (though I think it would have been better if I used more apples). All we had was wholewheat flour, but it still tasted great, and the wholewheat made it taste healthy, so we ended up eating a lot of it :)
For the past two days I've talking about twitter and mentioned some twitter basics. Today I'm writing about how to find people on twitter, and some strategies if you're using twitter for a business.
How to find people
On the upper part of your twitter screen you'll see a link saying "Find people". If you click on that you'll see a search box. If you type, say, "craft" in that box and press search it will come up with popular people whose username contains craft.
My preferred way to find people though is through the search function. If you go back to your home page you'll see a search box. Type something in there, like, say, craft. It will come up with a list of people who have just tweeted about crafts.
Another good way to find people is to go to someone's twitter page (click their username) and see who is following them, or who they are following.
Each Friday you'll see tons of tweets that start with this: #FF. That stands for Follow Friday. It's basically just shoutouts to people they are following and it's another great way to find new people to follow.
Twitter strategies I'm just going on the assumption that you're not using twitter for solely fun reasons, but that you're also going to use it to as a marketing and selling tool. If you're doing it for fun, then just start tweeting!
If a large number of followers is something that is important to you there's a few things you might want to do before you follow a bunch of people. First of all, I'd definitely fill in your profile. You can do that by going to settings, then profile. Many people, including me, don't automatically follow back, so the profile is something I look at to determine if I want to follow you. You also add your avatar in the profile section.
I'd also recommend adding a background picture. Go to design, then all the way on the bottom is "change background image". Click "tile background" if you want the pic to repeat, instead of just having one pic filling the screen (you might have to resize it). If you're selling something tangible, this is a good place to show off a product.
Decide what kind of account you will run. There are some businesses that just tweet updates. This might work as a sales tactic for well established and popular sellers, but I for one hardly ever follow people like this. It is however the easiest and less time consuming way, so you should decide if you want to go the easy route, or if you also want to use twitter for networking purposes. I haven't had any sales from twitter, so I can't really speak from experience how to exactly get sales, but I've read that it's much better if you tweet "conversational" things as well as sales type posts.
Do a bunch of tweets first. I also base whether to follow back or not on what someone tweets about. So I'd do maybe 10 or so tweets over a few days before you start following a bunch of people, especially people whose "following" number is much lower than their "followers" number.
What do you tweet about? Anything really. If you want a successful etsy seller to emulate I'd check out CrochetGal's twitter page. You can tweet about something interesting you saw that day, a cool recipe or pattern that you came across, etc. I'd also start talking to people right away, using the @. If I see a twitter page of someone who doesn't have any @ on their page of tweets I often don't follow them. To me that means you're not interested in the social aspect of twitter, and that don't like helping, sharing, or encouraging other people (at least on twitter).
And that's all I can think of. Let me know if I can answer any questions, and say hello to me at http://twitter.com/thatyarnstore
How to use twitter On the right hand side you'll see your username and under that is the number of times you've tweeted. A tweet is anything you've posted. To post a tweet type something in the text box and then click "Tweet". Tweets need to be 140 characters or less. If you clicked "Follow" to anyone yesterday you'll see everything they've tweeted recently in your home page. If you're not following anyone yet feel free to follow me. Go to my twitter page and click "follow". How to respond to someone Hover over their tweet and you'll see "reply" click that. In your tweet text box you'll see @username. The @ is how you respond to people. You don't have to click reply, you at hand type the at symbol and the username instead. When you type the at symbol in the beginning of a tweet only the person you are talking to and people who are following them (or just happen to be looking at your tweets) can see it. If you want everyone to see a tweet which is talking about someone you can write "I love @username", then everyone who is following you can see that tweet. To see if someone has mentioned you click @"yourusername" on the right side of your page. What is Retweet? Retweet is when you share a tweet that someone else has written with your followers. You can hover over their tweet and click "retweet", or you can type the following in your text box "RT @username" and then copy and paste whatever they said. Remember to put the RT in front, and not the back because you need something in front of the username so everyone who is following you can see it. Some people put their comments on a RT in front, some people put it after the quote, right after // or some other symbol. To see if someone has retweeted something you wrote click "Retweets" on the right hand side and then "Your tweets retweeted" Hashtag You'll start seeing a bunch of tweets that look like this: #knit. This is kind of like putting keywords onto a tweet, it makes it easier for people to find tweets on a certain topic when searching. To save someone else's tweets Hover over their tweet and click on the little star above "retweet". You can find it again by clicking favorites Lists You can put anyone on a list, even if you aren't following them. Lists can be public, meaning anyone can follow them, or private meaning only you know they are on your list. Lists contain a just a collection of tweets made by the people on the list.
Well, I had no idea I had to say that much about the mechanics of twitter. Tomorrow I'll talk about how to find people, and some newbie strategies for following and being followed.
I love twitter. I love how it connects communities, and that you can talk with someone who has the exact same view point as you, or an entirely different outlook on life. I love how it's almost a living entity; full of thoughts, feelings, and information from around the world. But enough of what I think...
What is twitter? Twitter is a social network. Everyone on twitter can post anything they want, as long as it's 140 characters. You can either post updates or musings, or talk with anyone you want (there is a block function though). You can also "follow" people, meaning that once you follow someone everything that is being said by the people you follow shows up on your homepage.
Signing up with twitter is very simple: 1. Go to twitter.com and click "Let me in". 2. Type in all the required fields. Pick a good username. You can change it later on, but it might confuse your followers so it's not very advisable. On twitter someone's username is very visible, and when people talk to you on twitter they refer to your username, so make sure it's one you're comfortable with. Also pick a good password (do not pick the word password as your password! hackers always try these first). When you're done click "Create my account." 3. The next step just suggests popular people you can follow. I would start by adding a few people (like, say, 5) you're interested in, like maybe a news source you'd actually like a source from. You can go back to this later, I'll explain tomorrow. 4. Click "next step: friends." 5. You can skip this and go to "others" if you'd like. 6. Type anything you're interested in, like "crafts" and it will bring up the popular people with that keyword. If you want to know more about a particular person you can click their name (right after the @ symbol) and it will bring them up in a new window. You can go back to this later, I'll explain tomorrow. 7. Go to your email and confirm your twitter account.
And you're done!
Tomorrow I'll talk more in detail about how twitter works, and a few things that you should do before you start wildly following people.
Now that I've finished the glove I think I'm ready to take out my next long-term UFO.
I stopped knitting this nearly two years ago, when I returned to England. I had finished the body and much of the sleeves, and then left it with dad in America to put it up in the yarn store as a large "swatch" example for the yarn (though I think it was actually in a plastic bag that whole time). This past Christmas I got it back, and I think I'm ready to finish it! I've already ripped out the not very nice looking sleeves, and so it's just a matter of reknitting the sleeves and knitting the collar.
But, these are much more exciting: Also, I thought this was interesting: Even though the hedgehog is the focus of the shot, I think the bottom one, where he's off to the side, is a much better picture.
This might be the last of my photography experiment posts for a few weeks at least. I think it's time for me to move on... But feel free to keep it going, do your own experiments, and grab the code below and share it on your blog.
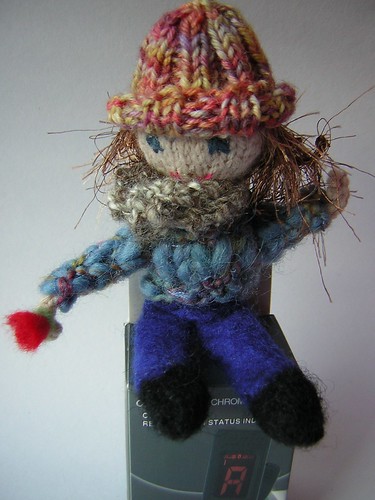
It's me! You know how I can tell? The flyaway hair.
I'm only about 6 inches tall and knitted. My sweater was hand-knit, pants were felted and then sewn together, shoes are needle felted onto my feet (à la ironfoot), knitted hat sewn onto my head so it wouldn't fall off, bits of yarn sewn in, and of course I have a little felted flower in my hand. BTW, I'm wearing so many layers because I'm always cold!
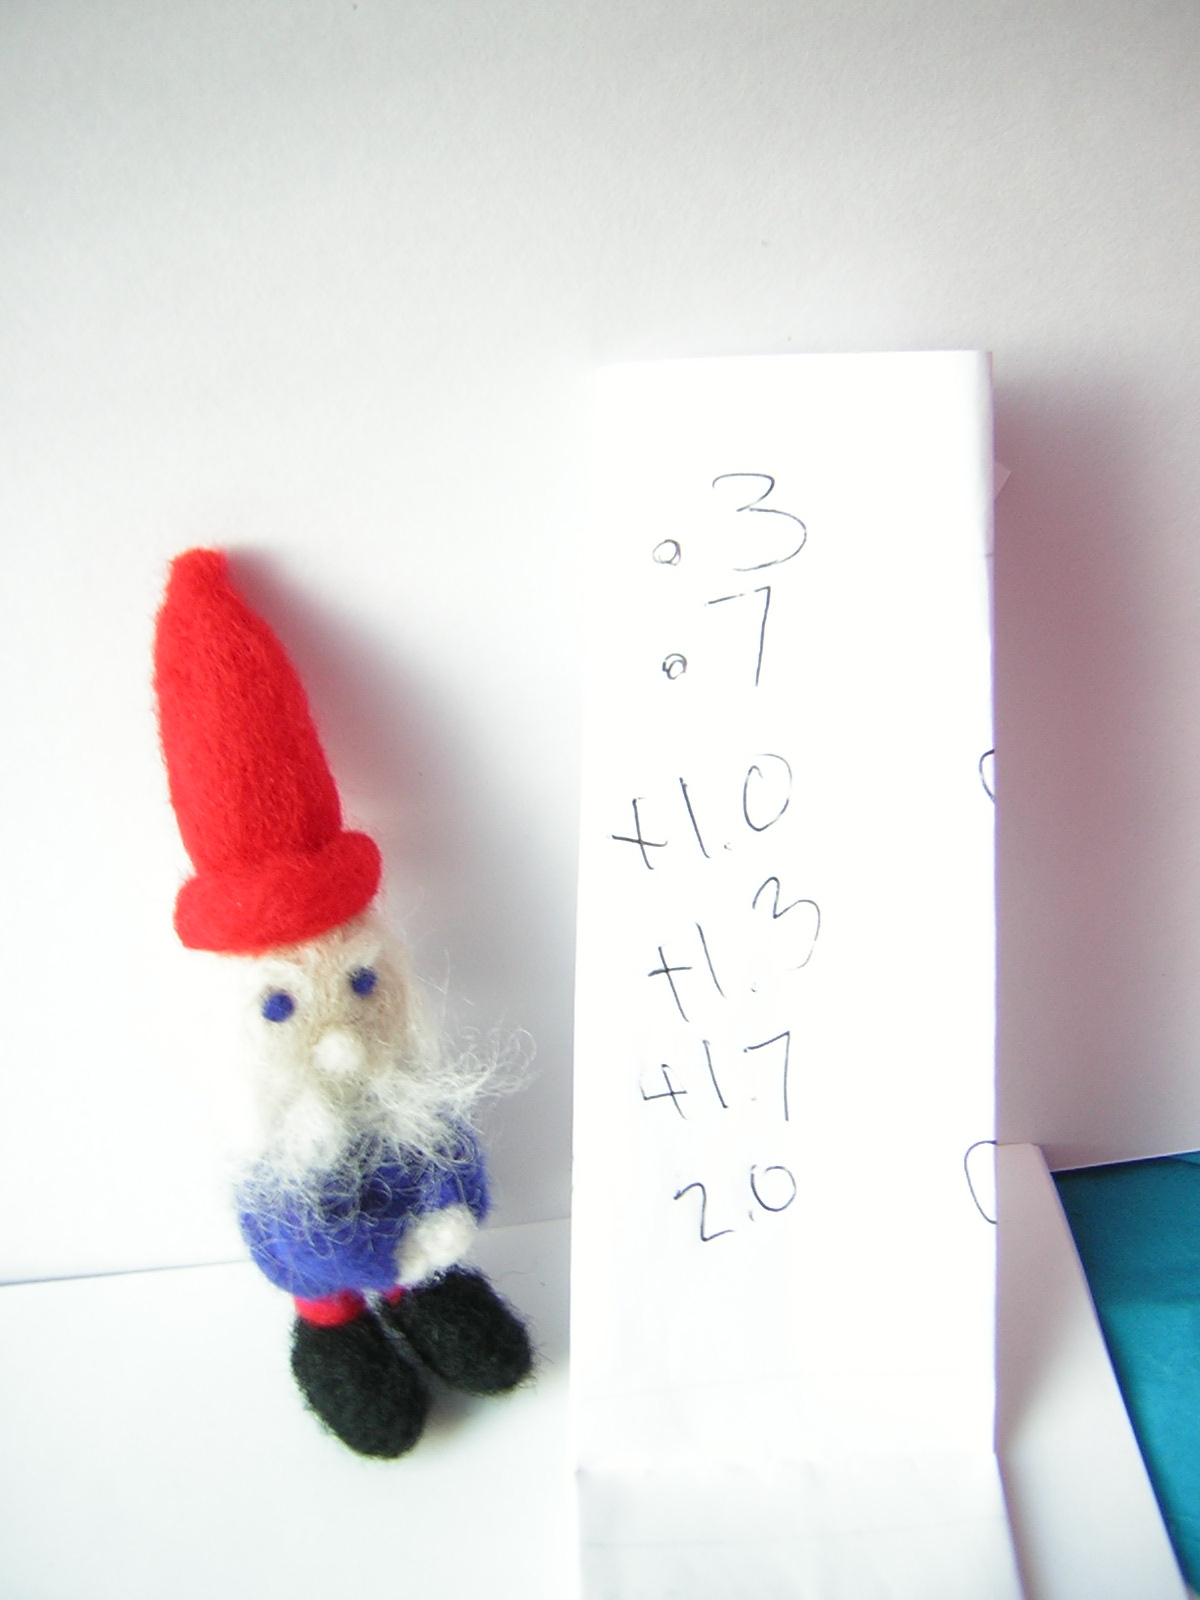
I decided to do some more photography experiments today, to find out three things: 1. What is the best time to take pictures 2. Which is the best white balance presetting to use when shooting near a window - auto or cloudy 3. What's with the exposure setting
I'm thinking of doing this experiment again in a few days, just to make sure, but it looks to me like 3 is the best time for pictures. Why? Because if you look at this pic taken at 8:30 at night:
And then this one taken at 3:15
to me it seems like 3 pm has less harsh light, and produces less shadow. The same was true comparing 3 pm with the earlier times as well.
I also found out that Auto produces a better picture than cloudy when it's bright outside, and when it's cloudy outside the "cloudy" setting looked better. Big surprise there *sarcasm*. But, I was surprised that the "daylight" setting turned the pictures blue:
Here's the outcome of my exposure experiment: This is +2, taken at 8:45 pm
If you want to join me, eyebehold and Creations by Teein our quest to become better photographers, feel free to add your name to the list and post the list on your blog.
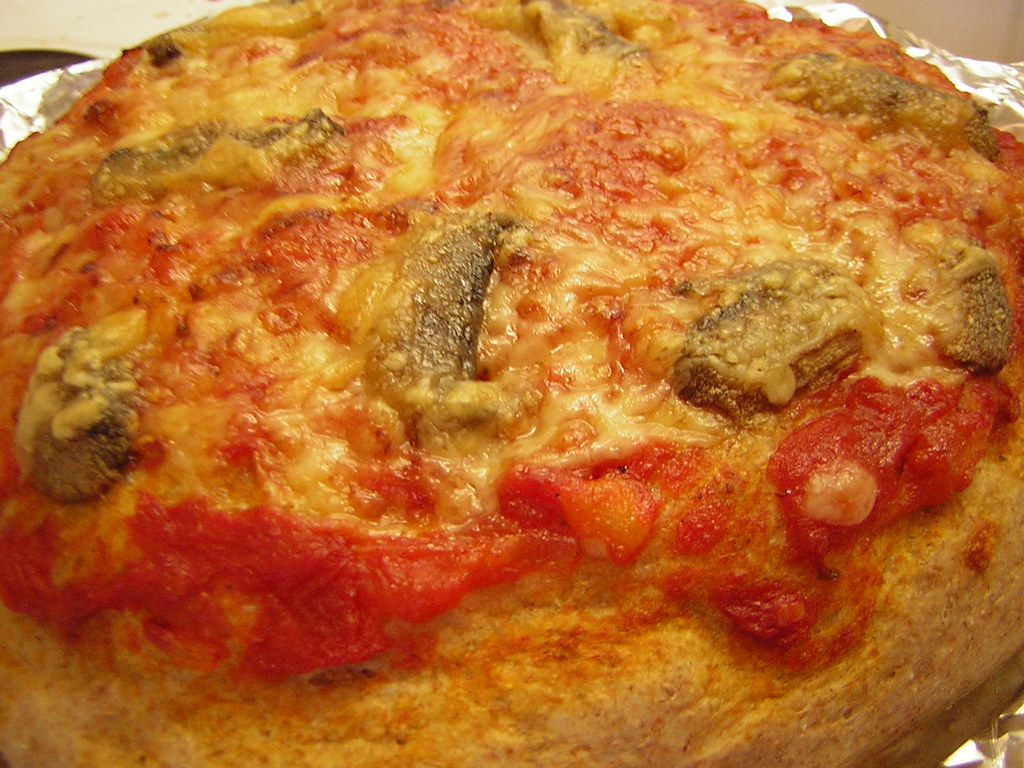
So I'm part of a weekly bake-along over on ravelry and last week's theme was pizza.
Yum! I used half the recipe for a smallish pizza, the other half was for bread.
I can't remember the last time I made pizza, and I was surprised how few ingredients and steps were needed. The hardest thing was the ten minutes of kneading, which actually felt like 20. But you know, it wouldn't hurt me to develop better upper body strength.
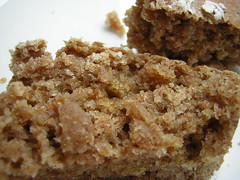
And then on Sunday J was having a bit of a bad day and requested a dessert, so I made Brown Sugar Chew.
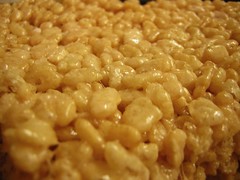
This week's bake-along is Rice Krispies Treat (really easy, feel free to jump in and join us). I had to go to a large and slightly more upscale grocery store than the neighborhood ones to find marshmallows, apparently it's a US thing (like microwave popcorn)...
It was a test of willpower to wait until they were cool!
And that was all in the last few days, and I just might make another pizza very soon (have I mentioned already that it was really yummy?).
The story behind them is that I had wanted to make J another pair of socks, and she picked out the Kristy pattern from Cookie A's Sock Innovation book.
My stockinette gauge swatch was correct, only I had forgotten that I knit my cables super tight, and I had already finished quite a bit of it before I found out it was too small. So, I decided to knit gloves instead. I had never knit gloves before, and couldn't find a pattern that fit my gauge, so I made things up as I went along (not recommended, you'd think I would have learned by now). Still, I'm mostly happy with them.
What: Gloves Casted On: August 31, 2009 Finished: June 13, 2010 Yarn: Trekking sock yarn, dyed with black beans Pattern: Kristi (ravelry link)
I didn't write down the pattern, but, I can tell you that the pinkie finger was 21 stitches and the rest were 24 stitches, and that for most of the fingers I decreased using: Row 1: knit 4, k2tog, repeat Row 2: Knit 3, k2tog, repeat Row 3: Knit 2, k2tog, repeat Row 4: K1, k2tog, repeat Row 5: k2tog, repeat
At least I didn't finish during the hottest part of the year ...
So last week I talked about how I wanted to learn to take better photographs. Well today I finally finished reading the manual - it's 100 (small) pages!
I'm really glad I read it, there was one whole setting (scene) which I assumed, for some reason, didn't do anything interesting, but it actually has some helpful preset options.
I learned my camera has a Copy setting, which will take a clear pictures of printed text or drawings on a white board.
It also has a sunset/sunrise setting which does this: to photos in normal lighting :)
The manual also had some helpful tips about shooting with auto.
For instance with autofocus, if the camera is unable to focus on subject at center of frame you can focus on another subject which is at same distance, lock the focus (by holding down the shoot button halfway) then recompose picture and press the shoot button down all the way.
Also if you're on auto and you want your subject focused by at the side of the frame, you should briefly put the subject in the centre of the composition, press the shoot button halfway then, with finger still on the button, recompose the picture, and press the shoot button down all the way. Which makes perfect sense, I just never thought of it!
Here's the pic taken like normal: Here's the one which was focused first with the panda in the centre, then recomposed Can you see the difference? It's very slight, but panda on the bottom photo is a little sharper.
Next up I'll be experimenting with exposure and ISO.
If you want to join me and eyebehold in our quest to become better photographers, feel free to add your name to the list and share it on your blog.
Since starting my etsy shop I've been looking into ways to recycle shipping supplies.
I suppose some of it's economic (so customers don't have to pay higher shipping and handling fees), but it's mainly environmental. And I realize now that recycling doesn't just have to stop with a reused mailer, there are a lot of other creative and cool ways to recycle.
Many of these I'm planning on using, and not just with etsy, but hopefully with everyday shipping too.
The etsy forums have a lot of helpful hints, like:
Don't reuse Priority Boxes, not even turned inside out. This is not allowed by the postal office, and often they get angry about it.
Tyvek Envelopes were highly recommended when you have to go with pre-bought shipping pads. They are made from recycled milk and water jugs.
Several people recommended ironing used gift tissue paper.
Another tip I liked is to save the non-written-on side of Christmas cards for tags and notes.
It was also suggested that if you do recycle packaging that you also buy a stamp or tape that reads "I recycle," so your client doesn't think you're just being cheap.
Several people on the etsy forums said they turned cereal boxes inside out and used those as shipping packages.
These cool envelopes were made by Marmalime out of old maps. I asked her about them and she said: "Most of the envelopes that I re-cover with maps are tyvek or weather proof, plus I'm adding the extra layers of maps so I'm not too worried about leaks. I sometimes sew my own envelopes with packaging foam or bubble wraps and recycled maps, and then put orders in an extra plastic bag just in case."
There's actually a whole group on flickr devoted to etsy packaging. Not all of it is recycled, but it's good for inspiration.
I personally have gotten bubble wrap (called jiffy packs in the UK) from freecycle.
The Crochet Queen over on etsy writes her thank you notes on the back of monopoly money (from a set which has lost too many pieces). How cool is that!
Here's some instructions on making your own envelope. Probably best for personal use though, the post office might not like them.
I was impressed that many of Tamdoll's items are sent in pillowboxes that she makes herself. I didn't ask in time for permission to include the pic here, so you'll just have to click here to see it.
I was really happy to see there was a Youtube tutorial on how to do it!
I've been seeing a lot of crafty giveaways around the internet town lately, so I thought I'd do a mini giveaway round up for you, because everyone likes free! Three Choices Giveaway on The Wugg's Backyard
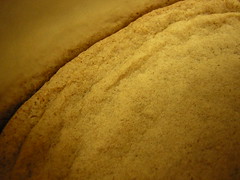
This week's bake-along theme was bread, but I wasn't feeling like making a "proper" yeast/kneading bread.
Actually it isn't really fair for me not to think of this as a proper bread. Baking isn't a competitive sport, right? Right??
Instead, today I made Guinness soda bread. It was very easy, no kneading involved. It also tastes good and has a very interesting flavor. Doesn't really hurt that it has sugar in it too :)
I often look at people's photographs on blogs or etsy and get jealous, wishing I knew how to make beautiful and non-blurry pictures.
So I've decided I'm going to.
Even though I don't have a fancy camera (actually I have an old crappy one), I figure even if I can't produce super high quality photos, I can at least improve.
And I'm hoping a few of you will join me! Why? So we can encourage each other, and because I've found if I announce something on the blog I'm much more likely to do it : )
I've made a blog hop for you to add your name to, and if you want you can put it on your blog as well. It's a shared list and people see the same list on each blog, so we can follow each other's progress.
Here's what I'm planning on learning and reading this week