I had a cold, and spent much of the weekend on the couch or in bed looking and feeling miserable. I'm feeling much better this morning, well enough at least to post on the blog and take a shower, and yes, I do know that last fact is far too much information, but I actually have a good reason for sharing. Last week I covered a bar of soap in fibre, and I used it for the first time today.
I had followed the tutorial from Mielke's Fiber Arts. But I knew before I started that I wanted to make one modification to the instructions, so I took some of my own pictures.
Here's my supplies.
 The fibre is North Ronaldsay, which is a sheep from Scotland that lives mainly on seaweed. Postmodern, don't you think?
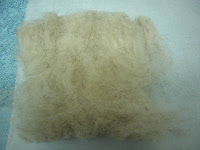
I put down the lengthwise layer of roving on the fabric
 folded it
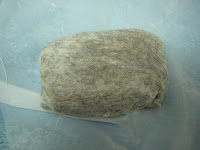
 and then placed down the width wise layer, and made a little fiber pillow.
 And then, right after I took this picture, I realized I didn't have any hot water for the next step.
I can't remember what I did as I was waiting for the water to boil, but I can assure you it wasn't interesting.
So my main mod from the tutorial was that I used some loose-weave polyester fabric around the bar of soap for the initial felting, and speaking from experience it works much better than working with it by hand. If I don't use the fabric the fibres usually stick to my hands, which is a bit too chaotic for me. I've seen videos where someone puts soap all over her hands first, then rubs the fibres, but seeing as the fibre is wrapped in soap that just seems wasteful and weird.
 The soap was very floppy floppy (technical felting term) to begin with.
 And then it started going crazy with the suds, and I was feeling like I was in that soap car in Charlie and the chocolate factory. Here it is just starting to go sudsy,
  but unfortunately I don't have any other pictures of the chaos after this because my hands were wet and covered in soap and suds, and I didn't want to damage the camera. It was around this time that I just used my hands and took the fabric off.
Towards the very end, when it was almost totally felted, I did rub it on a harder surface on (some plastic bubble shelving from IKEA) to speed up the process, as the instructions suggested.
The finished product after drying.
 And in case you're wondering, no I don't smell like wet sheep right now.

OH MAN that is so friggin' amazing! I want to learn how to felt so I could make something like this too :D
ReplyDeleteI was just thinking I want to make some of these. Thanks for the tutorial!
ReplyDeleteRocky - you should make it! All you really need for it is roving, the rest is just useful, but not necessary.
ReplyDeleteNeedles- You're welcome. Have fun with the suds.
Thanks for the tutorial - a good use for some scraps of wool I have leaft over!
ReplyDeletegreat tutorial! thank you!
ReplyDelete